Data Bridge can build you forms that insert and update into a database. To turn any text fields on those forms into file upload fields, you can follow the steps in this tutorial.
- Dreamweaver CS3 or higher
- Data Bridge
- Site properly defined in Dreamweaver
You should have on your Insert and Update pages, a field that you want to replace with your Digital File Pro file field.
The following instructions guide you through adding Digital File Pro's Upload behavior to your Data Bridge Insert page.
Step 1: Creating the file field
Use the following instructions for creating this field for your Insert page.
- From the Dreamweaver Files panel, open your Data Bridge Insert page.
- Select the field you want to replace with a file upload field.
- From the Properties Inspector, select the ID for that form field.
- Press Ctrl (Cmd) C to copy the ID.
- Select the field on the page again.
- Press Delete on your keyboard to remove this field.
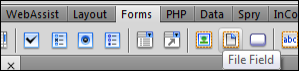
- Choose the File field option from Forms category of the Insert bar.
- Place your cursor in the ID field and press Ctrl (Cmd) V to paste.
- Leave the Label field blank.
- Click OK.
Step 2: Applying Digital File Pro
Next you will want to apply the Digital File Pro Upload behavior to your new file field.
- In Dreamweaver, open the Insert page.
- From the Insert menu, choose WebAssist > File Manipulation > Upload.
- From the File field option, choose the file field you just created.
- Click Next.
You may want to specify other settings, but they are not necessary for this tutorial.
- On Step 2, specify the Upload directory you wish to store these images.
You may also want to specify multiple output options. For example, if you want a detail image and a thumbnail image, Digital File Pro v2 can create this for you from just one upload.
- Click Finish to create the file upload behavior.
Step 3: Updating the Insert Record server behavior
We now need to update the Data Bridge Insert record server behavior to accommodate the file field.
- From the Server Behaviors panel, double-click on the Insert Record option.
- Click Next.
- Select the column you applied the file field to.
- Click the value lightning bolt.
- Expand the WA Upload File option for your column.
- Choose Server File Name.
- Click OK.
- Click Finish.
With your Insert page complete, you now need to do the same with the Update page. The process is similar, but requires an additional step.
Step 1: Creating the file field
Use the following instructions for creating this field for your Update page.
- From the Dreamweaver Files panel, open your Data Bridge Update page.
- Select the field you want to replace with a file upload field.
- On your keyboard, press Ctrl (Cmd) T.
This displays the Quick Tag Editor.
- Change <input type="text"> to <input type="hidden">.
This is done to allow us to display the value for the form field that is currently entered into the database.
- Place your cursor beside the hidden form field icon.
- Choose the File field option from Forms category of the Insert bar.
- Place your cursor in the ID field and enter an id for this field.
- Leave the Label field blank
- Click OK.
Step 2: Applying Digital File Pro
Next you will want to apply the Digital File Pro Upload behavior to your new file field.
- In Dreamweaver, open the Insert page.
- Choose WebAssist >File Manipulation > Upload.
- From the File field option, choose the file field you just created.
- Click Next.
You may want to specify other settings, but they are not necessary for this tutorial.
- On Step 2, specify the Upload directory you wish to store these images.
- Choose the Default file value lightning bolt.
- Expand the WADAUpdateForm option.
- Choose the form field you set to hidden earlier.
- Click OK.
The remaining settings should be specified as they were with the Insert page.
- Click Finish to create the file upload behavior.
Step 3: Updating the Update Record server behavior
We now need to update the Data Bridge Update record server behavior to accommodate the file field.
- From the Server Behaviors panel, double-click on the Update Record option.
- Click Next.
- Select the column you applied the file field to.
- Click the value lightning bolt.
- Expand the WA Upload File option for your column.
- Choose Server File Name.
- Click OK.
- Click Finish.
With your file upload complete, you may want to customize the Data Bridge Detail and Results pages, to display the image uploaded.
The following instructions refer to an image upload application. However, if you are using Digital File Pro to upload files, simply follow these steps, but instead of creating an image, simply create a link (a href="") tag
- Open the Data Bridge page that you wish to display the image on.
- Place your cursor where the image should display.
- From the Insert menu, choose Image.
- Choose the Data sources option.
- Expand the Recordset used by your Data Bridge form.
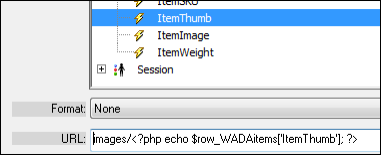
- Select the database column which contains your image file names.
- Place your cursor at the beginning of the line of code, before the URL field.
- Enter the path to the directory on your server, where the images are stored.
Make sure to include the ending "/".
- Click OK
You can also display these images on any non-Data Bridge created page by creating a new recordset for you database table, and then following the steps above
Nothing, because now you are finished. High five!


FPhu61701534: 5 Years, 2 Months, 3 Weeks, 4 Days, 13 Hours, 37 Minutes ago
Can you make a Youtube video showing the steps on how to upload an image file and then to display it on a webpage?