
Super Suite
Get all extensions for one suite price
Design Extender
Design and create unlimited websites
Data Bridge
Develop database-driven websites
eCart
Build a responsive shopping cart + checkout
MySQLi Server Behaviors
Generate streamlined MySQLi
Free PayPal Toolkit
Paypal, PayPal Credit, and Skype
Help

Design Extender allows you to create a web page that displays a map and driving directions. These same steps can be used with Pro Maps for Google.
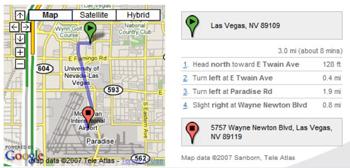
Create a map on your website with driving directions from one location to another.
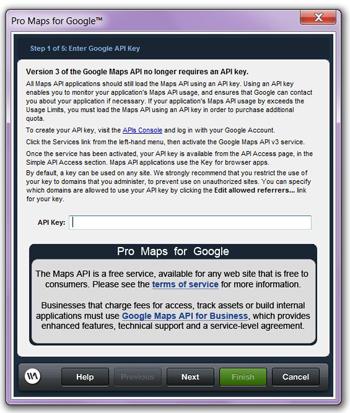
In Dreamweaver, navigate to the WebAssist button. Choose Insert Google Map in the drop down menu for directions to obtaining your Google API key. Copy (Ctrl or Cmd + C) and paste (Ctrl or Cmd + V) the API key into the appropriate box. Click Next.
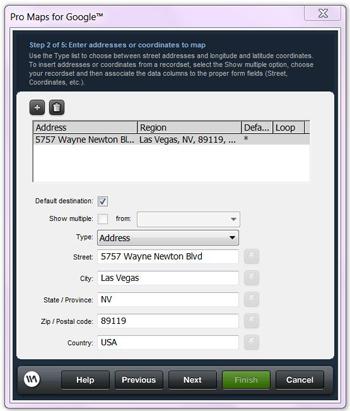
To enter the destination address, click the Add button in the upper left corner. Then check Default destination and enter the destination address, for example McCarran International Airport. Click Next.
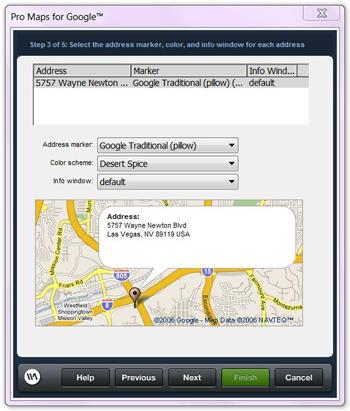
Now it's time to modify the map. To make changes to the Address Marker, select Google Traditional (pillow). Set your desired Color Scheme and leave default for Info Window setting. Click Next.
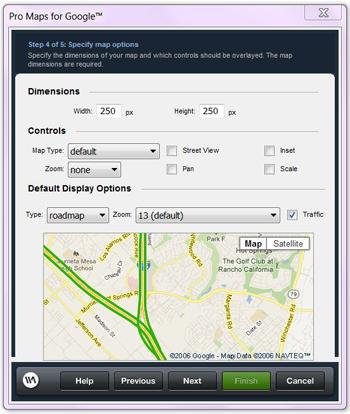
Customize the dimensions of the map by entering 250 for both width and height. Under Default Display Options, check Traffic. Click Next.
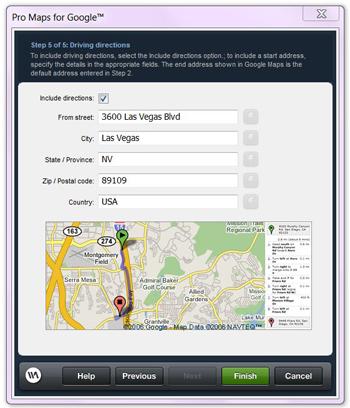
To complete the driving directions, check the Include directions box. Then enter the start address, for example Stratosphere Hotel and Casino. The destination address was already completed in Step 2. Click Finish.
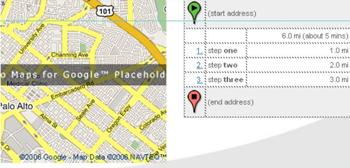
Go to your Dreamweaver page where you will see 2 placeholders, one for the map and the other for driving directions. To move the placeholders, go to the Design button, then simply click and drag.

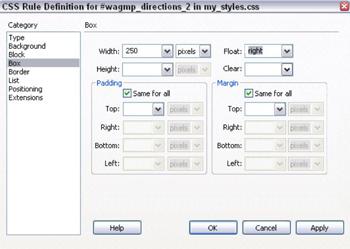
Or you may prefer to move the placeholders side-by-side. This will require editing the style sheet.


If you are satisfied, save (Ctrl or Cmd + S) and preview in your browser (F12).
Comments will be sent to the author of this tutorial and may not be answered immediately. For general help from WebAssist, please visit technical support.
Sign in to add commentsYour friends over here at WebAssist! These Dreamweaver extensions will assist you in building unlimited, custom websites.
These out-of-the-box solutions provide you proven, tested applications that can be up and running now. Build a store, a gallery, or a web-based email solution.
©1999-2026 WebAssist.com Corporation. All rights reserved and all that jazz.

Account or customer service questions?
Please user our contact form.
Need technical support?
Please visit support to ask a question
Justin Hood: 13 Years, 3 Months, 2 Weeks, 6 Days, 19 Hours, 3 Minutes ago
Nice tutorial!