
Super Suite
Get all extensions for one suite price
Design Extender
Design and create unlimited websites
Data Bridge
Develop database-driven websites
eCart
Build a responsive shopping cart + checkout
MySQLi Server Behaviors
Generate streamlined MySQLi
Free PayPal Toolkit
Paypal, PayPal Credit, and Skype
Help

Setting up a PHP/MySQL testing server on your own computer is an invaluable time saver for web developers. Once set up and functioning properly, you can develop, test, and prep your dynamic sites without having to upload to your live server every time you make a change.
This tutorial shows you how to set up your Windows machine to run a PHP/MySQL testing environment that you can use for testing PHP pages.
If you are a Mac OS X user and want to set up a testing server view the tutorial for Installing MAMP on OS X.
In most cases, having a local testing server will save you time and make developing your dynamic website easier. However, depending on the extent to which a customer is developing websites, this may not be necessary.
...you are not creating/modifying PHP pages.
...you are using a WebAssist Solution Pack and have no intention of customizing the code or functionality.
In this case, you should upload the Solution Pack directly to your server after modifying the necessary configuration files.
...you are using a product that creates PHP pages but you don't need to test until you upload to your live server.
...you are using eCart, DataAssist, or SecurityAssist to create a dynamic application. This will significantly speed up your development process.
IMPORTANT! IIS comes standard on many Windows computers, and will definitely be running if you've ever enabled (or attempted to enable) a testing server on your Windows machine using IIS. Even if you didn't turn it on, let's make sure it's off to avoid conflicts.
For Windows XP and Vista
For Windows 7
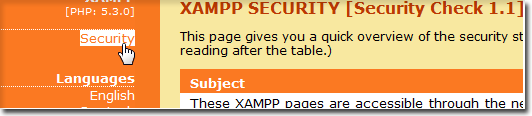
XAMPP installs everything you need to run PHP pages and a MySQL database on your local machine.


Once installed, you can use the XAMPP Control Panel to start your testing server.

With your testing server now installed and running, there are a few final steps you should take to make sure everything is configured to work perfectly.
Best practices encourage you to always have a password specified for your MySQL database, and we think you should too.

You've now determined the username and password that you will use every time you need to access your database, or create a database connection in Dreamweaver.
Each time you change your password, you will need to restart your testing server for the change to take effect. Access the Control Panel by double-clicking the XAMPP icon in your taskbar. Choose Stop and then Start beside the MySQL option to restart the database.
Lastly, you should test your PHP Installation to make sure everything is set up for you to load PHP pages on your local computer.

If you see a PHP page similar to this, you have completed setting up your PHP/MySQL testing server.
Now that your testing server is completely set up, you can preview your PHP pages on your local computer. In order for this to work, you need to store your website's files in C:\xampp\htdocs.
Now, you should define a site in Dreamweaver that utilizes your testing server. This will allow you to preview any PHP pages that you are developing without uploading them to your live server.
Comments will be sent to the author of this tutorial and may not be answered immediately. For general help from WebAssist, please visit technical support.
Sign in to add commentsYour friends over here at WebAssist! These Dreamweaver extensions will assist you in building unlimited, custom websites.
These out-of-the-box solutions provide you proven, tested applications that can be up and running now. Build a store, a gallery, or a web-based email solution.
©1999-2026 WebAssist.com Corporation. All rights reserved and all that jazz.

Account or customer service questions?
Please user our contact form.
Need technical support?
Please visit support to ask a question
Brendan: 12 Years, 4 Months, 3 Weeks, 5 Days, 16 Hours, 27 Minutes ago
If i have a site that i have already built without the local test server, how do i begin to use the local test server for future developement/changes/additions?
Anna Robinson: 12 Years, 5 Months, 1 Week, 6 Days, 16 Hours, 41 Minutes ago
Just follow this tutorial to get your local test server set up. If you don't have your site locally at all, you can FTP it down and then define your local and remote servers in Dreamweaver. If you need further details, click help in our main menu so technical support can assist you with the back & forth in a timely manner. :)
Brendan: 12 Years, 5 Months, 3 Days, 9 Hours, 55 Minutes ago
This tutorial outlines the install process, which I have found 100s of times online. Is there a follow up that might show someone (me and other novice programmers) how to setup a virtual directory (so that we can continue to store our site files in the directory where we save sites), and then how to export the local database to our live server?
Also, maybe what Brian asked was how to bring the live database down to the local test server so that you can test changes and new features without being on the live site?
Team WebAssist: 12 Years, 5 Months, 2 Days, 15 Hours, 34 Minutes ago
For testing server configuration questions like creating virtual directories, try http://community.apachefriends.org/f/
Tech support also recommended this one: http://w3shaman.com/article/creating-virtual-directory-apache
For transferring database updates up and down (local to remote), you can import and export a sql file through phpMyAdmin. Here is one tutorial we have on this:
http://www.webassist.com/tutorials/Import-a-sql-file
: 11 Years, 9 Months, 4 Weeks, 2 Days, 17 Hours, 51 Minutes ago
Where you stated above to turn off the iss modules (I copy and pasted your directions below) after the directions please read my comment.
Your directions
Open your Windows Control Panel from the Start menu.
Click Add/Remove Programs.
Click Turn Windows features on or off, located in the left-hand pane.
Uncheck the ISS modules and click OK.
My comment...
I followed this for windows 7 and apparently it is not top left but middle top of screen for turn windows features on or off
Then where you say uncheck ISS modules, well, there aren't any so for a noob like me I would be entirely lost right here...which I was.
I considered that maybe you made a typo and meant IIS modules, so I unchecked those.
I hope I don't mess up my computer or am shutting off something I was not supposed to.
So with this said maybe it's a good idea to tell people exactly what ISS stands for? like "Internet Service Something or other" it is important to be very clear in instructions or there are going to be very frustrated people who just spent $799 dollars and wondering if it was worth it....Obviously after $799 one gets a little scared to want to go and spend another $99 for tech support based on poor explanations. Food for thought!
Team WebAssist: 11 Years, 9 Months, 3 Weeks, 6 Days, 16 Hours, 6 Minutes ago
Thank you for your feedback. It looks like the acronym is spelled out in the Windows XP section, but not Windows 7, so we can fix that. Our tech support is free though, just so you know. Click on help in the main menu anytime!
: 8 Years, 4 Months, 4 Weeks, 1 Day, 23 Hours, 40 Minutes ago
Instead of Windows based platform, I would recommend setting up PHP site on a Linux based platform. Linux more stable and secure than Windows. If you don't know how to setup a website on Linux based server, then you can use Cloudways platform (https://www.cloudways.com/en/php-cloud-hosting.php ). This platform lets you launch a Linux Debian based server on an infrastructure in one-click. The server will have OS, stack and PHP already installed.