
Super Suite
Get all extensions for one suite price
Design Extender
Design and create unlimited websites
Data Bridge
Develop database-driven websites
eCart
Build a responsive shopping cart + checkout
MySQLi Server Behaviors
Generate streamlined MySQLi
Free PayPal Toolkit
Paypal, PayPal Credit, and Skype
Help

Setting up a PHP/MySQL testing server on your own computer is an invaluable time saver for web developers. Once set up and functioning properly, you can develop, test, and prep your dynamic sites without having to upload to your live server every time you make a change. Mac OS X comes with an Apache server and PHP installed by default, but they lack a great deal of the useful tools you will be using and they require you to be comfortable using Terminal which many new developers can find cumbersome.
This tutorial shows you how to get around using Terminal and easily set up your Mac to run a PHP/MySQL testing environment that you can use for testing PHP pages. If you are a Windows user and want to set up a testing server view the tutorial for Installing XAMPP on Windows.
In most cases, having a local testing server will save you time and make developing your dynamic website easier. However, depending on the extent to which a customer is developing websites, this may not be necessary.
...you are not creating/modifying PHP pages.
...you are using a WebAssist Solution Pack and have no intention of customizing the code or functionality.
In this case, you should upload the Solution Pack directly to your server after modifying the necessary configuration files.
...you are using a product that creates PHP pages but you don't need to test until you upload to your live server.
...you are using eCart, DataAssist, or SecurityAssist to create a dynamic application. This will significantly speed up your development process.
IMPORTANT! Apache comes standard on many Mac computers, and will definitely be running if you've ever ever enabled (or attempted to enable) a testing server on your Mac using the default Apache server. Even if you didn't turn it on, let's make sure it's off to avoid conflicts.
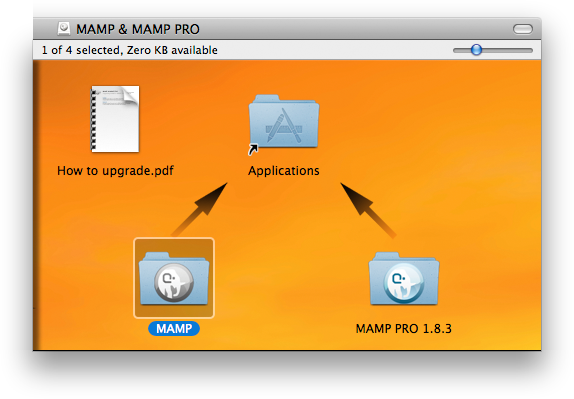
MAMP installs everything you need to run PHP pages and a MySQL database on your local machine.
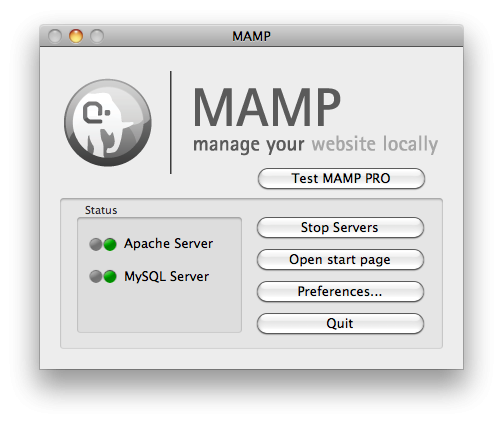
Once installed, you can use the MAMP Control Panel to start your testing server.
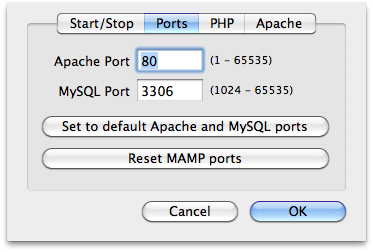
To ensure the testing server works on the default port (80), you should change the port numbers used.
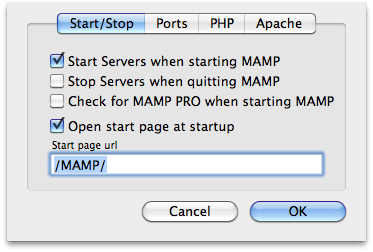
With your testing server now installed and running, there are a few final steps you should take to make sure everything is configured to work perfectly.
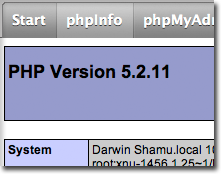
You should now see a confirmation window informing you that 'MAMP is installed on your Mac and everything is working!' This interface allows you to configure certain MAMP settings
You should test your PHP Installation to make sure everything is set up for you to load PHP pages on your local computer.
This page displays the login credentials for your MySQL database. The username (SuperUser), 'root' is created for you automatically and is the username you can use for accessing your MySQL database or creating a database connection.
If you see a PHP page similar to this, you have completed setting up your PHP/MySQL testing server.
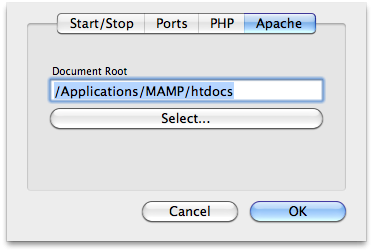
Now that your testing server is completely set up, you can preview PHP pages on your local computer. The location on your computer to place your files by default is /Applications/MAMP/htdocs. You can change this in the Apache tab in the MAMP Control Panel Preferences.
Now, you should define a site in Dreamweaver that references your testing server.
Comments will be sent to the author of this tutorial and may not be answered immediately. For general help from WebAssist, please visit technical support.
Sign in to add commentsYour friends over here at WebAssist! These Dreamweaver extensions will assist you in building unlimited, custom websites.
These out-of-the-box solutions provide you proven, tested applications that can be up and running now. Build a store, a gallery, or a web-based email solution.
©1999-2026 WebAssist.com Corporation. All rights reserved and all that jazz.

Account or customer service questions?
Please user our contact form.
Need technical support?
Please visit support to ask a question
Daryl: 12 Years, 9 Months, 6 Days, 22 Hours, 18 Minutes ago
Im waiting for my first Mac to arrive and thought I would read up first.
I am currently running EasyPHP on my Windows setup which allows me to setup aliases which I can then point to the folder that I am working in for each website. Can you do this in MAMP or would you need to create a new folder in /Applications/MAMP/htdocs for each site and then have duplicates of each website on your computer?
Jason Byrnes: 12 Years, 9 Months, 6 Days, 14 Hours, 41 Minutes ago
Hi Daryl,
MAMP has 2 flavors, the basic Free Version, and MAMP Pro. In the basic Free version, you can only set the document root, you cannot create aliases using the MAMP Control Panel. The Pro Version does allow for setting aliases in the MAMP Control panel.
However, in both versions you can create aliases by editing the Apache httpd.conf file. It takes some experience with Apache to do this, but the documentation is available on the apache website:
http://httpd.apache.org/docs/2.2/mod/mod_alias.html