Hiya Michael,
Nice to hear from you again!
I'm not sure I quite understand what you mean about dragging files in to dreamweaver files panel or FTPing to cpanel'
The surest way is to define a site in Dreamweaver with local and remote details all entered, and use the in-built 'Test' button to make sure you have access to a working FTP connection in Dreamweaver.
I apologise if I've misunderstood, and the following instructions are redundant, but they might help, and someone else may benefit.
-------------------------------------------------
Open Dreamweaver, and in the Menu bar at the top, select; Site > New Site > and in the window that opens, make sure the 'advanced' tab is selected.
Under 'Category', select 'Local Info'. [See attached image, site_definition1.png]
Site name: Choose a name for your local Site.
Local root folder: Click the little folder icon and navigate to the folder that contains all your PS3 files and folders. (You may have to select a file inside that one for the right path to show up) Your path may look something like: C:\Inetpub\wwwroot\PowerStore300\
Links Relative to: Make sure 'Document' has been selected.
Then under 'Category' again, select 'Remote Info' Your hosting provider should have given you all the necessary details.
Access: Choose 'FTP' from the select list.
FTP host: This will be something like 'ftp.mydomainname.com' or
Host Directory: This may be something like 'html/mydomainname.com/
Login: Your FTP login name (might be the same as your cpanel login name)
Password: Your FTP Password (might be the same as your cpanel login password)
[See attached image, site_definition2.png]
Click the 'Test' Button, and you should see a pop-up message saying, "Dreamweaver connected to your Web Server successfully [See attached image, site_definition3.png]. If it doesn't, then contact your hosting provider to request all the FTP information mentioned above. (FTP Host, Host Directory, Login and Password).
If all is fine, then Click OK, and then OK again to exit the site definition.
Dreamweaver will now create your cache, this may take a few of seconds. When it has finished, your PowerStore site (i.e. Files and Folders) will show up in your Files panel.
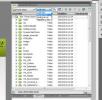
With your Dreamweaver 'Power Store' site defined, and the FTP connection tested and working, you can upload the whole site to your remote server. If you like, before doing that, you can click on 'Local View' in the bar at the top of the files panel and choose 'Remote View' just to check that your files will be uploading to the right directory. [See attached image, site_definition4.png] The very top level should read the same as you entered for 'Host Directory' above.
Now switch back to 'Local View'. Click the top level folder that will read (something like) 'Site - Power Store'.
Finally, click on the 'upload' icon, which is a blue Arrow pointing upwards. Another pop-up message will ask you, "Are you sure you wish to put the entire site?"
Click OK. If prompted with any messages about overwriting files or about synchronisation info, just keep clicking OK or agree to any options.
The files will take some time to upload, and you will know when it's finished when the 'background activity' indicators are finished.
Then in your browser, navigate to yourdomain.com and the Installation checks and instruction steps will begin.
Hope this helps; - if you get problems post back with which stage caused problems and any messages you get.
If I've completely missed the point, sorry - and post back with more detail!
Cheers.


