Step 1: Select Sites to Import
The first step of the wizard specifies the site to be imported and the local destination to write the files. Click Next to proceed to the next step of the wizard.
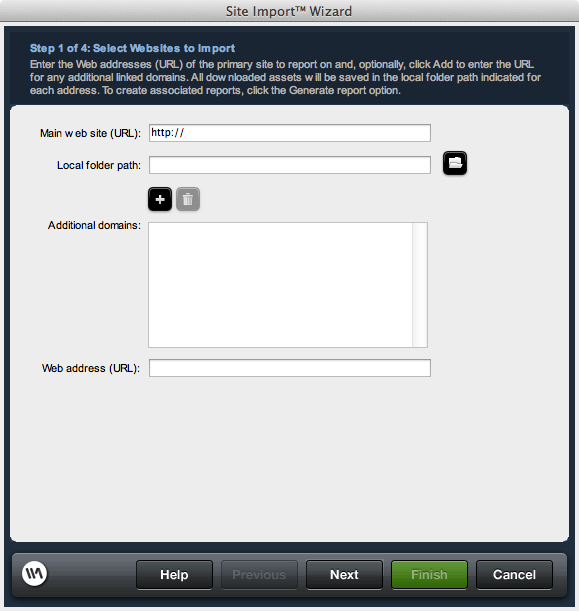
Main web site (URL): Enter the http:// location of the site you wish to import. You must include the fully formed web address (e.g. http://) and the filename and extension (e.g. index.asp). Files will be retrieved from the site using the last folder specified as the root location.
Local folder path: Specify the location accessible to your local machine where you wish the local files to be placed.
Additional Domains:Files in higher subdirectories will also be retrieved if specified in this area. Click Add and then enter the web address in the Web address (URL): field. Once entered, press Enter, or click the Add button to enter an additional directory.
Open Generated Report?: When checked, the Site Report will be displayed in your default browser when the import and reporting processes are complete.
More details details regarding Site Report are available at the Site Report page.
Main web site (URL): Enter the http:// location of the site you wish to import. You must include the fully formed web address (e.g. http://) and the filename and extension (e.g. index.asp). Files will be retrieved from the site using the last folder specified as the root location.
Local folder path: Specify the location accessible to your local machine where you wish the local files to be placed.
Additional Domains:Files in higher subdirectories will also be retrieved if specified in this area. Click Add and then enter the web address in the Web address (URL): field. Once entered, press Enter, or click the Add button to enter an additional directory.
Reporting
Generate Report?: Check this box if you wish Site Import to also conduct a site report. Options to configure the site report settings will be available after configuring your site import.Open Generated Report?: When checked, the Site Report will be displayed in your default browser when the import and reporting processes are complete.
More details details regarding Site Report are available at the Site Report page.