Add to Cart Button
You can choose to use the default PayPal Add to Cart button or specify the URL for an image you would prefer to use as the button.
Access
PayPal Add to cart buttons can be access through the following locations:
- Insert > PayPal > Payment Buttons for PayPal
- WebAssist > Payment Buttons for PayPal
Step 1
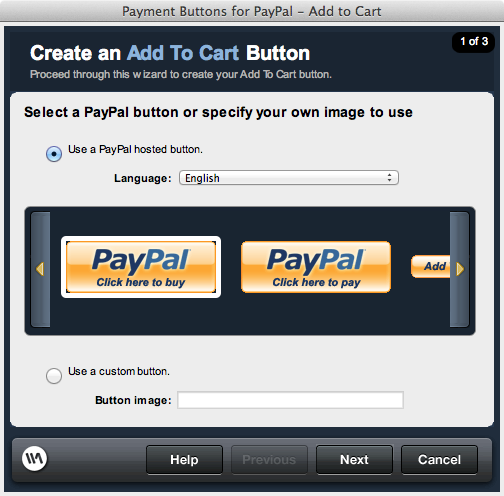
- Use PayPal hosted button: Hosted PayPal buttons are much more secure than nonhosted buttons. They do not allow customization within the code, which protects against unauthorized customization of buttons
- Language: This is a list of all available PayPal languages
- Button: This is a list of all available buttons in the selected language
- Use a custom button: If a custom image is to be used
- Button image: This box is for the URL of the image to be used as the button image
Step 2
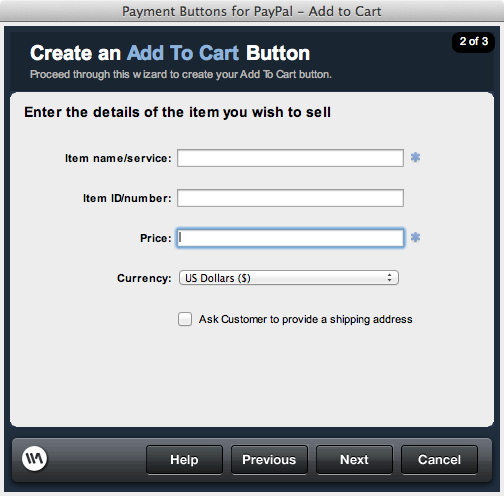
- Item name/service: Enter the name of the product or service this button is created for.
- Item ID/number: Enter an ID/Number for this product. For example, you could enter the Stock Keeping Unit (SKU).
- Price: Enter the price of the product/service you are selling.
The minimum price for any PayPal button is 1.00.
- Currency: Choose your currency.
- Ask Customer to provide a shipping address: If selected, the customer will be required to complete the shipping address fields. This is important if you are selling a physical good that you will need to ship to the customer.
Step 3
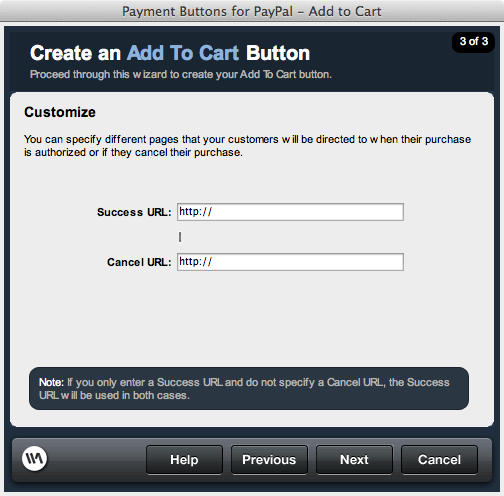
- Success URL: Enter full http:// URL to the webpage on your site that you want your customer directed to after completing purchase.
- Cancel URL: Enter full http:// URL to the webpage on your site that you want your customer directed to if they choose to cancel their purchase or if the transaction fails.
Note: If you only complete the Success URL, your customer will be directed to that page whether the transaction is complete or cancelled.