Ill try to explain it a bit here lets see open a new page on dreamweaver and click on the webassist tools for eric meyers CSS sculptor then select what ever layout you need on the first tab, then click the second tab "BOX".
There you will find a list look on that list for:
ContentWrapper
|
|---> Content
Now click over content and look for the button on the top that has a plus or Add simbol click over it and add under Content a new Div it would be something like this
ContentWrapper
|
|---> Content
.................|---> Div
Rename it to what ever you like i called it LeftBox.
Repeat again selecting the Content on the list and add a new one and so on until you are satisfied
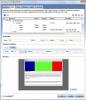
check the picture attached to this post.
Ok after you got BoxLeft, Boxright, and BoxCenter add boxleft float: left this can be done at the properties options just below, you will find the option just after where you place the width and height also add a size example width: 200px height: 300 for BoxLeft.
Now select BoxRight, and do the same on width and height, 200x300, but select Float: Right.
And now select the last div you added wich we named BoxCenter dont add a size to it Dont!!!! just check down a bit more where you will see Margin & Padding, now here is the tricky part you have to play with the margin i placed all to 0px and the last one with is margin left i placed 200px example
Top: 0px Right: 0px Bottom: 0px Left:200px
ok done with that now click on padding and add what ever you need i placed 0px for all but u can play with it to make it look better, ok after this click on Design and add the backgrounds and settings to your need, also play with the size i placed all depends on how you want them look also depends on the size of the website i used the standard one by default to make the screenshot i placed here.
Good luck with it hope this helps :)
Pd forums needs a but of let us place codes like <strong> and shitz... and sorry my not so good english..